Introduction
The Apache HTTP web server is currently the most popular web server software in the world. It is well suited for working with large projects and is very flexible in terms of configuration, which makes it possible to implement all the features of the hosted web resource.
In this guide you will learn how to install Apache web server on RedHat based distributions (CentOS, AlmaLinux).
Step For AlmaLinux 8 Only: Import GPG Key Repository
This step is for AlmaLinux 8 only. Skip this step if you are installing Apache on CentOS 7.
Run the following command to install updated GPG keys on AlmaLinux 8:
rpm --import https://repo.almalinux.org/almalinux/RPM-GPG-KEY-AlmaLinux
1. Installing Apache
Make sure your software is updated before the actual installation. You can do this with the following command:
yum update
After updating the packages, run the following command to install Apache:
yum install httpd
2. Starting Apache
To start Apache, run this command:
systemctl start httpd
3. Apache Status Check
To check Apache status, run the following command:
systemctl status httpd
The output will provide Apache and some additional information:

You can also verify if Apache was enabled on your server, by entering your server's public IP address in your web browser:
http://your_server_IP_address
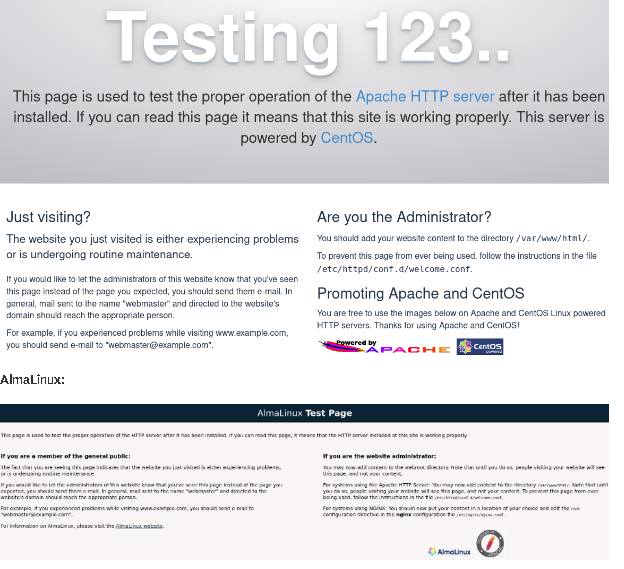
If everything is correct, you will see the default Apache web page (different for CentOS and AlmaLinux):
CentOS:

AlmaLinux:

4. Additional Configurations
If you don't want Apache to start automatically on every system boot, run the following command:
systemctl disable httpd
If you want to re-enable this feature and automatically start Apache after every boot, run the following command:
systemctl enable httpd
To stop Apache, run this command:
systemctl stop httpd
You can restart Apache with:
systemctl restart httpd
To reload Apache without losing connections, enter the following command:
systemctl reload httpd
5. Virtual Host (Optional)
VirtualHost is a directive in the configuration file of the Apache web server, designed to match IP addresses available on the server, domains and directories on the server, as well as manage sites available on the server.
You can create a virtual host configuration file by typing this command:
vi /etc/httpd/conf.d/yourdomain.ltd.conf
Add these lines to the configuration file:
<VirtualHost *:80>
ServerAdmin admin@yourdomain.ltd
DocumentRoot "/var/www/html"
DirectoryIndex index.html
ServerName yourdomain.ltd
ErrorLog "/var/log/httpd/yourdomain.ltd.error_log"
CustomLog "/var/log/httpd/yourdomain.ltd.access_log" common
</VirtualHost>
After editing, you can save changes and exit.
Be sure to restart Apache after creating the configuration file:
systemctl restart httpd
To establish a secure connection, you can check our guide for Let's Encrypt.